Laying artificial grass may seem simple—but the hidden layer beneath it can make or break your lawn. Many turf installations fail not because of the grass itself, but because the base underneath was poorly chosen, too thin, or improperly compacted. If you’re unsure what to put under artificial turf, how thick it should be, or how to prepare it correctly, you’re not alone.
This guide walks you through everything you need to know about building a stable, long-lasting base for synthetic grass. We’ll explore the most popular base materials and compare their pros and cons. You’ll learn which base drains best, how deep your foundation should be, and how to install it step by step. We also cover whether you can lay turf directly on soil, sand, or concrete—and how to adjust your approach for pets, slopes, and DIY projects. Finally, we’ll show you common base preparation mistakes to avoid, and why your base is the single most important factor in turf performance over time.
Key Takeaways at a Glance:
- Choose the right base material—DG, Class II Road Base, and CMB each have unique pros and cons.
- Use well-draining materials like DG or Road Base to prevent pooling and odor buildup.
- Match base depth to your project—from 7.5 cm for backyards to 15+ cm for driveways and sports fields.
- Install your base in compacted layers and add a slight slope (1–2%) for proper drainage.
- Avoid skipping the base—direct installs on soil, sand, or concrete can lead to serious issues.
- Pick a base that fits your use case—pets, slopes, high-traffic zones, and DIY projects all need tailored solutions.
- Don’t make common mistakes like undercompaction, poor drainage, or forgetting edge restraints.
- Remember: a strong base is not optional—it’s the foundation of a turf system that actually lasts.
Popular Base Materials for Artificial Grass (with Pros & Cons)
There are several base materials you can use for artificial turf, and each one affects how your lawn performs over time. In this section, we’ll break down four of the most popular artificial turf base materials: Class II Road Base, Decomposed Granite (DG), Crushed Miscellaneous Base (CMB), and solid surfaces like concrete or asphalt. You’ll learn the pros and cons of each type, so you can decide which base works best for your project.
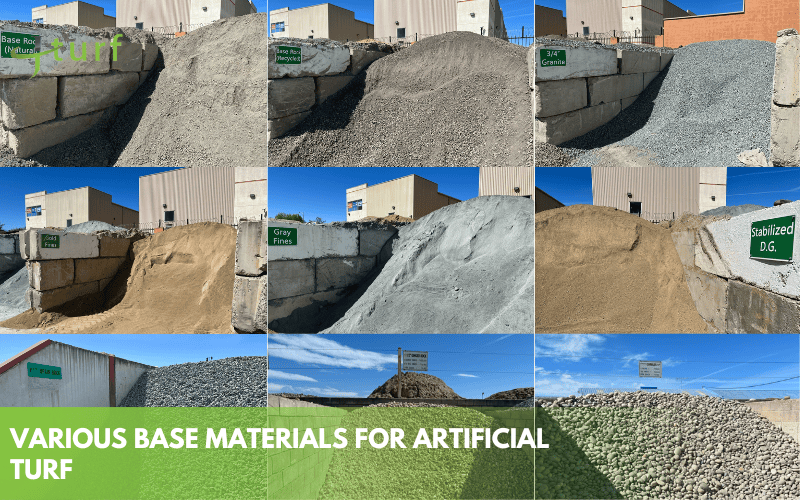
Class II Road Base
This is a professional-grade blend of crushed rock and fine particles. It compacts tightly, drains well, and provides a stable foundation under most turf installations. It’s often the go-to choice for contractors and is suitable for both residential and commercial use. However, it can be harder to work with for DIYers and may require access to a plate compactor.
Decomposed Granite (DG)
DG is a compactable material made from weathered granite. It offers good drainage and a smooth surface finish. Many homeowners prefer DG for pet-friendly lawns or dry climates where it stays firm. Keep in mind that it may cost more than other options and should be properly moistened and compacted in layers during installation.
Crushed Miscellaneous Base (CMB)
CMB is a mix of crushed concrete, asphalt, and gravel. It’s a budget-friendly alternative that still performs well when compacted properly. While it may not offer the same consistency as road base, it’s often good enough for backyard turf or other light-use applications. It’s also widely available in most regions.
Concrete or Asphalt (as Solid Base Alternatives)
If you’re installing turf over an existing concrete or asphalt surface, you may be able to reuse it as a base. This saves time on excavation, but it’s important to ensure drainage by drilling holes or adding a drainage layer. Solid bases lack natural shock absorption, so they’re not ideal for playgrounds or sports fields.
Which Base Is Best for Drainage?
The best base for drainage under artificial turf is a compacted layer of Class II Road Base or Decomposed Granite (DG). These materials allow water to pass through easily while staying firm and stable under the turf.
Good drainage is essential for preventing water pooling, odors, and long-term turf damage. Class II Road Base combines crushed stone with fine particles, making it both supportive and permeable. DG works especially well in dry climates and is often preferred for pet areas because it controls moisture and smell.
Avoid using fine sand or untreated soil—they hold water and block drainage. To make your base even more effective, compact it in layers and add a slight slope (1–2%) away from buildings to guide runoff.
How Deep Should the Base Be? (Turf Base Depth Guide)
Base depth is one of the most overlooked factors in artificial turf installation—but it directly affects drainage, durability, and long-term appearance. In this section, we’ll outline the recommended base thickness for different use cases, from residential lawns to sports fields. Whether you’re working with pets or planning a driveway, getting the depth right is key to a stable, long-lasting turf system. (Note: 1 inch ≈ 2.54 cm)
Standard Residential Lawns
For most backyard or front yard applications, a 7.5–10 cm base (3–4 inches) is ideal. This provides enough support and drainage without excessive digging. Use compacted Class II Road Base or DG in layers for best results.
Pet Areas or High-Drainage Zones
If you’re installing turf for dogs or in an area that gets heavy rain, go for a slightly thicker base—10–12.5 cm (4–5 inches). This helps fluids drain faster and reduces odor buildup under the turf.
Sports Fields or Heavy Foot Traffic
For athletic fields, playgrounds, or any area with high-impact use, aim for a 12.5–15 cm compacted base (5–6 inches). The extra depth prevents shifting, improves impact absorption, and extends the surface lifespan.
Driveways or Vehicle-Load Areas
If turf is used in load-bearing areas like driveways, you’ll need a 15–20 cm base (6–8 inches). It must be heavily compacted and may require geotextile reinforcement under the base to prevent sinking or rutting over time.
How to Prepare and Install the Base for Artificial Turf
Installing a strong, well-drained base is the most important part of artificial turf installation. A poorly prepared base can cause the turf to shift, sink, or flood. In this section, we’ll walk through five key steps to properly prepare and install the base layer for synthetic grass—from excavation to compaction and drainage. Whether you’re doing a DIY project or hiring a contractor, these steps apply to almost every turf installation.
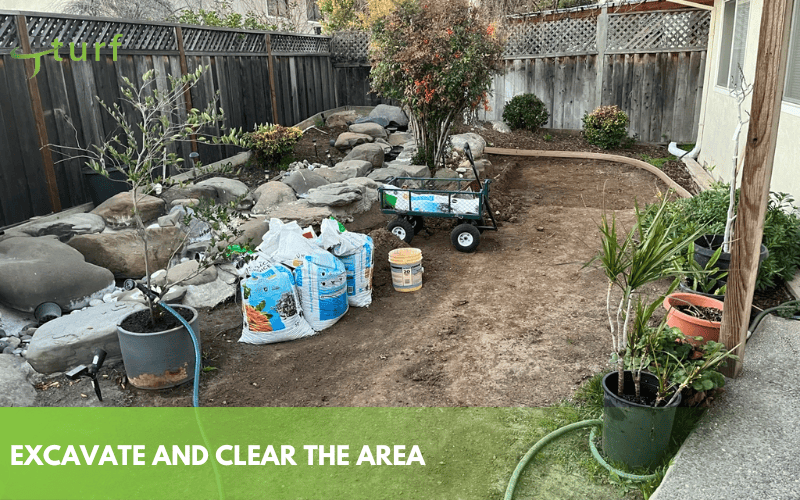
Step 1: Excavate and Clear the Area
Start by removing all grass, roots, and loose topsoil to a depth of at least 7.5–10 cm (3–4 inches), or deeper if needed for your use case. Be sure to also remove large rocks, tree roots, or anything that might prevent a level base. If the soil is very soft, consider going deeper to reach stable ground.
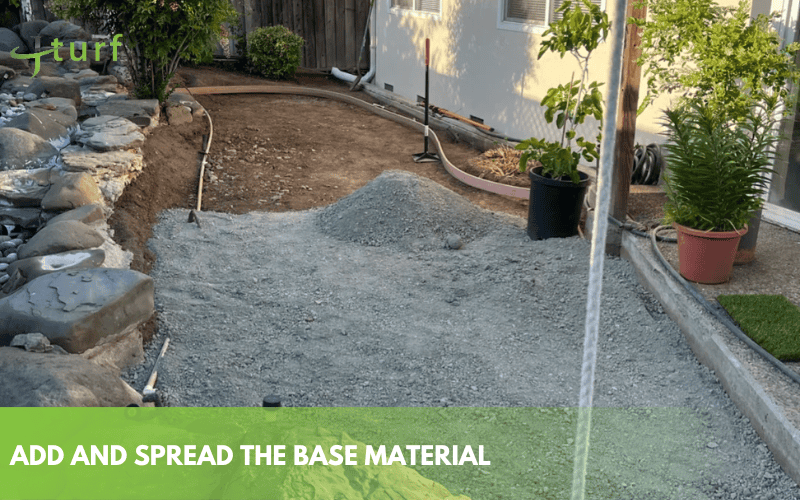
Step 2: Add and Spread the Base Material
Use your chosen base material—like Class II Road Base or Decomposed Granite (DG)—and spread it in layers. Each layer should be no more than 5 cm (2 inches) deep. This layering approach helps with even compaction and better water flow. Make sure the surface is as level as possible before moving on.
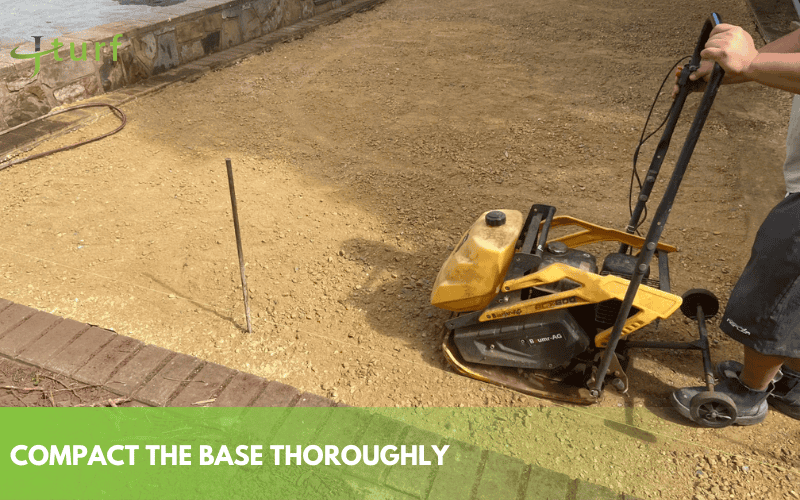
Step 3: Compact the Base Thoroughly
After spreading each layer, use a plate compactor to compress the base. This prevents the turf from shifting or settling later. You want each layer to reach 90–95% compaction before adding the next. Lightly misting the base with water can help improve compaction, especially for DG.
Step 4: Create a Gentle Slope for Drainage
To avoid water pooling, grade the base with a slight slope of about 1–2% away from buildings or hard edges. That’s about 1–2 cm drop for every 1 meter. Use a string line, level, or laser level to check the slope. Proper drainage keeps your turf dry and extends its lifespan.
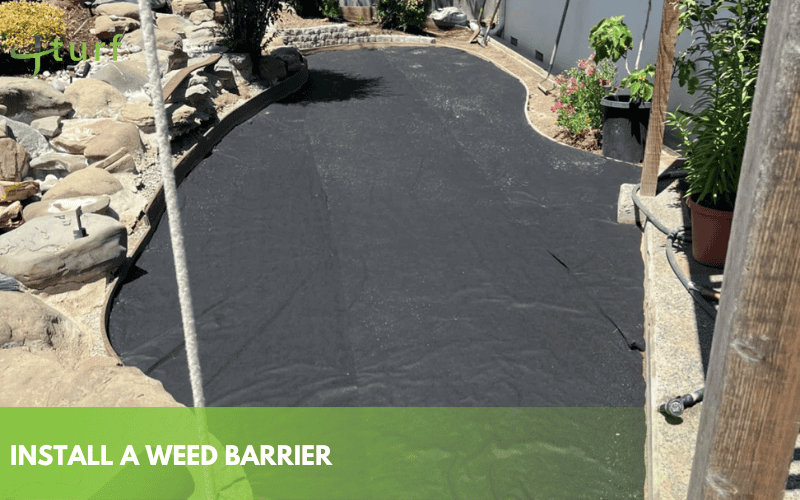
Step 5: Install a Weed Barrier (Optional but Recommended)
Before laying the turf, roll out a landscape fabric or geotextile layer over the compacted base. This helps block weeds and adds extra stability. It’s especially useful for long-term installations or areas with aggressive weed growth. Overlap seams by 5–10 cm and secure it with staples or pins.
Can You Lay Artificial Grass Directly on Soil, Sand or Concrete?
It’s a common question: can you skip the base and lay artificial grass directly on your existing surface? Whether it’s bare soil, loose sand, or hard concrete, the short answer is: it’s possible—but rarely a good idea. Each type of ground presents unique challenges that can affect how your turf drains, settles, and performs over time. Below, we break down the pros, cons, and possible workarounds for the three most common surfaces.
Laying Turf on Bare Soil
Directly installing turf on natural soil may seem simple, but it often leads to uneven surfaces, poor drainage, and fast sinking. Soil tends to shift over time, especially after rain. If you must use soil, compact it thoroughly and expect reduced durability. For best results, always install a compacted base layer first.
Laying Turf on Loose Sand
Sand may drain well, but it’s unstable. Turf laid on loose sand can ripple, shift, or sink, especially in high-traffic areas. The particles don’t bind, so there’s no real support underneath. If your site is sandy, mix in crushed stone or apply a stabilizing base before installing turf.
Laying Turf on Concrete or Asphalt
Turf can be laid on concrete, but drainage becomes critical. Since water can’t soak through, you’ll need to create drainage holes or use a turf backing with built-in drainage channels. Also, hard surfaces don’t offer shock absorption, making them less suitable for play areas unless a cushioning layer is added.
Choosing the Right Base for Different Scenarios
Not all artificial turf installations are the same. The right base depends on how the area will be used—whether it’s a backyard, a pet run, a slope, or a sports field. Some situations need better drainage, while others need extra stability or budget-friendly solutions. Below, we break down the best base type for four common use cases so you can match the right material to your specific project needs.
For Pet-Friendly Lawns
Pet areas need a base that drains quickly and controls odor. Decomposed Granite (DG) is ideal because it compacts well and allows liquids to pass through easily. Pair it with a pet-specific infill and avoid using non-compacted soil or sand, which can trap odors and moisture.
For Sports Fields or High-Traffic Zones
These areas require strong compaction and shock absorption. Use Class II Road Base compacted in multiple layers, and consider installing a shock pad or rubber layer under the turf for added cushioning. The deeper and more stable the base, the better it performs under pressure.
For Sloped or Uneven Ground
On a slope, the base must resist erosion and movement. Use crushed rock or DG with geotextile fabric beneath to hold the structure in place. Build in compacted layers and ensure the final grade still allows for proper drainage without runoff pooling at the bottom.
For Backyard DIY Installations
If you’re working on a small residential lawn with a tight budget, you can use Crushed Miscellaneous Base (CMB) or a mix of crushed concrete and stone. Make sure to compact thoroughly and keep the total depth around 7.5–10 cm. It’s affordable and works well for light foot traffic when installed properly.
Common Mistakes to Avoid When Preparing the Base
A poorly prepared base can ruin your artificial turf installation—even if the turf itself is high quality. To help you avoid common issues like sagging, water pooling, or turf shifting, here are the most frequent mistakes people make when building the base for synthetic grass, and how to prevent them.
Skipping Proper Excavation
Many DIYers don’t dig deep enough. Removing just a few centimeters of topsoil isn’t enough—soft earth underneath can cause the turf to sink or become uneven. Always remove at least 7.5–10 cm of soil and reach stable ground.
Undercompacting the Base
Failing to compact the base material properly is one of the top causes of turf movement and dips. Each layer of base should be compacted with a plate compactor until it reaches about 90–95% density before adding the next.
Using the Wrong Base Material
Materials like plain sand or untreated soil don’t provide structure or drainage. Use Class II Road Base, DG, or CMB instead, depending on your needs. These compact better and allow water to drain through.
No Slope for Drainage
A flat base sounds right—but without a slight slope, water will pool in low areas. Always grade your base 1–2% away from buildings to allow runoff.
Forgetting Edge Restraints
Without edge support like bender board or concrete curbing, the base can spread over time, causing the turf to lift or shift. Secure all outer edges before laying the turf.
Final Thoughts: Your Base Determines the Life of Your Lawn
A beautiful, long-lasting artificial lawn starts from the ground up. No matter how premium the turf is, it won’t perform well without a solid, well-prepared base. Drainage, stability, and appearance all depend on getting the foundation right.
Throughout this guide, we’ve covered the essential components of building a reliable base—from choosing the right material and depth to compacting in layers and preventing common mistakes. Whether you’re preparing a small DIY backyard or planning a large project, the same principle applies: the base is not optional. It’s the key to avoiding future repairs, poor drainage, and uneven surfaces.
Take the time to plan and prepare your base properly. If needed, don’t hesitate to consult a professional for evaluation or installation. A strong foundation is an investment in the lifespan and performance of your synthetic lawn.

