Imagine having your own putting green in your own backyard, so you can practice whenever you want without leaving your home. Building a backyard putting green is a worthwhile project that adds both fun and practicality to your home. Here’s your very own DIY tutorial!
What You Need to Know Before Installing: Artificial Grass or Natural Grass
When selecting a putting green for your backyard, you must choose between artificial and natural grass. Although both options offer advantages, artificial grass tends to be the more suitable choice for the majority of homeowners.
Artificial Grass:
- Pros: Low maintenance, durable, always green, no need for watering, mowing, or fertilizing, and it can handle various weather conditions.
- Cons: The initial investment is greater, and it might not offer the same authentic sensation of real grass beneath one’s feet.
Natural Grass:
- Pros: Feels more authentic, provides a traditional golf course experience, and can be a good option if you already have healthy soil.
- Cons: Natural grass necessitates high maintenance, involving frequent mowing, watering, and fertilizing, while being more vulnerable to weather conditions, pests, and diseases, and may not maintain its green color throughout the year.
Key Considerations Before Starting Artificial Putting Green Installation
Plan the Location and Design
Space and Size: The size should align with your goals. For smaller yards, a 10×10-foot green is ideal, while larger yards can accommodate greens from 20×20 feet to 30×30 feet. Ensure there’s extra room for movement and maintenance.
Choose the Ideal Location: Consider space, terrain, and sunlight exposure. Sunlight helps prevent moisture retention, while a slight slope (up to 2%) can enhance putting with natural breaks. Proper drainage is essential to avoid water pooling.
Slope and Drainage: Ideally, your putting green should be on a flat surface. Drainage is key to prevent waterlogging. In areas with poor drainage, consider adding drainage pipes beneath the green.
Design the Layout: Sketch the shape (kidney, oval, or freeform) and hole placements. Plan for 2-4 holes. Add undulations, breaks, and fringe grass for a realistic experience.
Consider Integrating Features: Adding sand traps, chipping areas, or multi-level tiers can create challenges and enhance practice versatility.Permits: Check if you need local permits, especially for excavation work. Some regions have landscaping regulations, so ensure compliance before starting.
Tools and Materials
Tools:
- Shovel: To remove existing grass and prepare the area.
- Rake: For leveling the ground and smoothing out any imperfections.
- Compactor: To compact the base and ensure a firm, even surface.
- Wheelbarrow: For transporting sand, gravel, and other materials.
- Tape Measure: To measure and mark the area for accuracy.
- Utility Knife: To cut turf and other materials to fit properly.
Materials:
- Artificial Turf: Choose high-quality synthetic grass designed for putting greens. It ought to possess durability, resistance to UV rays, and the ability to ensure a smooth and rapid ball roll.
- Infill: A material like silica sand, which helps keep the turf fibers upright and improves durability.
- Drainage Pipe: Perforated pipes to ensure proper water drainage beneath the turf.
- Base Materials: Crushed stone or decomposed granite serves as the foundation layer, providing stability and enhancing drainage.
How much sand do I need for a putting green?
Typically, you’ll need 1 to 2 pounds of sand per square foot of turf. For example, for a 10×15-foot green, that’s approximately 150-300 pounds of sand. Distribute the sand evenly to create a stable base and ensure smooth ball movement.

How to Build a Putting Green with Artificial Turf
Step 1: Preparing the Site
Proper site preparation ensures a smooth, functional putting green:
- Clear the Area: Use a sod cutter or shovel to remove existing grass, weeds, and debris, making sure to dig up any rocks and tree roots that might impact the surface, thereby creating a clean and flat area ready for turf installation.
- Prevent Weeds: To prevent future weed growth, lay down a weed barrier fabric or use an appropriate herbicide before installing the turf.
- Level the Ground: Utilize a rake to smooth out bumps and fill in any low – lying areas with soil, thereby creating a stable and even surface crucial for proper ball roll, and use a level to continually check the surface throughout the process.
- Consider the Slope: A slight slope of 1 – 2%, which can be ensured to be gentle and direct water away from the green using a level, aids in drainage and adds challenge to your practice.
Step 2: Setting Up Drainage
Good drainage is crucial for a long-lasting, playable putting green. Here’s how to set it up:
Dig a trench around the perimeter or in areas prone to water collection. Lay perforated pipes in the trench with the holes facing downwards. Cover the pipes with gravel to facilitate water flow and avoid water pooling. Make sure the trench has a gentle slope of 1 – 2% to divert water away from the green. After the drainage system is set up, add a base layer of sand or crushed stone prior to installing the turf.
Step 3: Installing the Base Layer
Now that your site is prepared, it’s time to set the foundation for your putting green:
Lay Gravel: Spread 4-6 inches of crushed limestone gravel (1/4 to 3/8 inches) evenly across the site. Use a rake or shovel for even distribution.
Compact the Gravel: Lightly moisten the gravel with a garden hose, then compact it using a plate compactor, turf roller, or manual tamper for smaller greens. This ensures the gravel is firmly packed.
Clear Gravel Around the Holes: Remove gravel from the hole areas, dig around the cups, and compact the gravel with a tamper, avoiding the edges of the cup.
Add Fines: Add 1-2 inches of stone dust or decomposed granite to fill gaps and create a smoother surface. Rake it evenly and compact it.
Smooth the Surface: Use the back of a lawn rake to smooth raised stones and fill depressions with sand for an even surface.
Check the Slope: Use a level to ensure the slope is 1-2% for drainage. Make sure the area within 3 feet around the hole is smooth and level for proper ball roll. Any adjustments needed are easier to make at this point before laying the turf.
What is the Best Base for a Putting Green?
| Material | Advantages | Disadvantages |
| Crushed Stone | Provides strong support, good drainage, compactable. | Can be rough to handle, may need additional leveling. |
| Gravel | Easy to spread, promotes good drainage. | Can shift over time without proper compaction. |
| Decomposed Granite | Smooth finish, easy to work with, good for drainage. | Can become too compact and solid if over-applied. |
| Stone Dust | Smooth finish, good for final surface layer. | Needs to be applied carefully to avoid over-compaction. |
| Sand | Good for leveling, can be added to improve base structure. | Poor drainage unless mixed with other materials. |
The best base for a putting green is usually a combination of crushed stone and a finer material such as decomposed granite or stone dust, a combination that strikes a perfect balance between stability, drainage, and flatness.
Step 4: Laying the Turf
With your base ready, it’s time to lay the turf, this step will give your putting green its final look:
Prepare the Turf: Most artificial grass comes pre-shaped, but if recommended by the manufacturer, unroll the turf and lightly spray it with a garden hose until it’s fully saturated. Let it dry for at least 24 hours to prevent shrinkage.
Cut and Connect Sections: Follow the manufacturer’s instructions to cut and connect the turf sections. Ensure that the fibers in all sections face the same direction.
Cut to Fit: Unroll the artificial turf onto the gravel base. Use a sharp utility knife to carefully cut the turf to match the area’s dimensions, leaving a slight excess along the edges.
Find the Hole Location: Press the turf down around the hole locations and use a utility knife to cut out the shape for the cup. Place any turf scraps into the cup to help with cleanup. You can rinse any debris out of the cup using a garden hose, as most cups have drainage holes.
Secure the Turf: Press the edges of the turf into place and ensure the seams are tight. Secure the turf using turf staples or landscape nails, or follow the manufacturer’s instructions for securing the turf.
Step 5: Adding the Cup and Flag
Now that your turf is laid and the base is ready, it’s time to add the finishing touches: the golf cup and flag. These elements are crucial for functionality and give your putting green its final look.
- Cut Holes: Use a cup cutter or a drill to create holes for the golf cups. The holes should be approximately 6 inches deep and level with the surface. Make sure the edges of the holes are smooth and clean to ensure easy ball placement and a professional finish.
- Install Flags: Once the cups are in place, insert pins or flags into the holes to mark them. This makes it easier to spot the cups from a distance, adding to both the look and functionality of your putting green.
Install Borders: Install boundaries using retaining walls, bricks, or other edging materials. Add landscaping around the edges.

How to Build a Putting Green with Real Grass
You can also create a backyard putting green with real grass, but you may have to put in more cost and effort.
- Plan the Site: Choose a level area with good drainage and at least 6-8 hours of sunlight daily. Measure and mark the desired size and shape of the putting green, considering available space.
- Prepare the Site: Remove grass, weeds, and debris with a shovel or sod cutter. Level the ground with a rake, filling low spots and smoothing out bumps for an even surface.
- Install the Base Layer: Add 1-2 inches of sand or soil to create a stable base. Compact the layer using a roller or hand tamper to ensure a firm, level surface for the turf.
- Lay the Turf: Select a suitable grass variety like bentgrass or Bermuda. Lay sod or seed evenly, ensuring no gaps between sections. Water the area well to help establish the grass.
- Install the Cup and Fla: Cut 6-inch-deep holes for the golf cups and install them level with the surface. Insert flagsticks to mark the holes, ensuring they are visible and accessible.
- Water and Maintain: Water the green regularly until the grass is established. Mow to a height of 0.5-1 inch and keep the surface clean. Perform periodic maintenance such as aeration, fertilization, and weed control to ensure optimal conditions.
How Long Does It Take to Make a Putting Green?
The time required to install a putting green depends on the materials and size of the project:
Installation Time: For a DIY project, basic installation typically takes 2-4 days, including site preparation, base setup, and turf laying. Larger or more complex designs, such as those with sand traps or water hazards, may take longer—up to 2 weeks or more. Professional installations generally take between 1 to 5 days, depending on the size and complexity.
When using real grass, it takes time for the grass to take root and grow. After laying the sod or seeding, it can take 2-4 weeks for the grass to fully grow and several months to mature. Synthetic turf has no curing time, so once the turf is laid and the edges are secured, the green is ready for use immediately.
Maintenance Tips for Putting Green Long-Lasting Performance
Routine Care
Cleaning Your Putting Green
- Regular cleaning is important to keep your putting green smooth and functional. Remove debris like leaves, twigs, or dirt using a broom or leaf blower. Periodically rinse the surface to eliminate dust or residue. For synthetic turf, avoid harsh chemicals that could damage the fibers.
Seasonal Maintenance
- Checking Seams: Regularly inspect the seams to guarantee their security, and if they begin to separate, utilize turf adhesive to re – bond them.
- Replacing Infill: Over time, the infill (like silica sand) may settle or degrade. Replace it as needed to keep the turf fibers upright and maintain smooth ball roll.
How Long Does a Putting Green Last?
A artificial putting green typically lasts 10-15 years with proper care. To extend its lifespan, avoid using sharp objects that can tear the fibers, and ensure the green is kept clean and free of debris. Regular brushing can help maintain the fibers’ shape and ensure a consistent putting surface.
How to Fix Common Issues
- Wrinkles: If wrinkles appear in the turf, try brushing the affected area with a stiff brush to restore the fibers. For larger wrinkles, you may need to lift the turf, flatten it out, and secure it back in place.
- Turf Shifting: Turf may shift slightly over time. If this happens, lift the turf, add a fresh layer of base material if needed, and re-secure the turf with staples or adhesive.
- Uneven Wear: Areas of the putting green that experience more traffic may wear down faster. To fix this, replace the worn turf or add more infill in the affected areas.
Putting Green Cost Breakdown and Considerations
When it comes to building a putting green, the cost can vary depending on several factors, including the materials used, whether you’re doing it yourself or hiring a professional, and the complexity of your design.
How Much Does It Cost to Build a Real Putting Green?
Building a high-end, professional putting green using natural grass can be quite costly. The cost for a quality, real grass green can range from $14 to $25 per square foot. This price includes the preparation of the site, specialized equipment, high-quality turf, and additional features like irrigation and drainage systems. You may also need a landscape architect or professional team to install and maintain it, which can further increase costs.
How Much Does It Cost to Install a Artificial Putting Green?
The cost of installing a artificial putting green can vary significantly based on whether you choose DIY installation or hire a professional.
- DIY Installation: The average cost for DIY installation of synthetic turf is typically between $5 to $10 per square foot. This includes the cost of materials like artificial turf, base materials (crushed stone, sand), and infill, along with basic tools like a shovel, rake, and compactor.
- Professional Installation: Hiring a professional can cost $10 to $20 per square foot, depending on the complexity of the project and the features you choose (such as custom shapes, slopes, or multiple holes). Professional installers bring expertise, which ensures the green is installed to the highest standard, saving you time and effort.
How Much Does 2000 Square Feet of Turf Cost?
For 2000 square feet of synthetic turf, you can expect the following estimates:
- DIY Installation: The materials alone will likely cost between $10,000 and $15,000, depending on the quality of the turf and other materials used (like sand, base layers, and infill).
- Professional Installation: With professional installation, the cost will range from $20,000 to $40,000, factoring in labor, custom features, and any additional landscaping needs.
Cost of Tools, Materials, and Additional Features
When considering the overall cost of your putting green, don’t forget to account for tools and any extra features you may want:
- Tools: If you’re doing it yourself, the cost of tools (shovel, rake, compactor, etc.) can range from $200 to $500. However, you may be able to rent tools for a fraction of the cost.
- Additional Features: If you want to include features like sand traps, slopes, or multiple hole placements, this will increase the cost. Adding sand traps or custom features could increase the price by $1,000 to $5,000 or more, depending on the complexity.
Are Backyard Putting Greens Worth It?
Yes. In the long run, backyard putting greens are a smart investment, particularly for golf enthusiasts or those who enjoy outdoor spaces. Here’s why:
- Return on Investment (ROI): Although the initial cost can be high, a well-maintained putting green can increase your home’s value, making it more attractive to buyers and potentially boosting resale value.
- Golf Skill Improvement: With a putting green at home, you can practice anytime, improving your skills without needing to go to the course. This is particularly beneficial for avid golfers.
- Entertainment and Enjoyment: A backyard putting green provides hours of fun and entertainment for family and friends, transforming your outdoor space into a social hub.
Find a Putting Green Manufacturer for a More Cost-Effective Solution
Building a putting green is an investment—not just in materials, but in performance, durability, and long-term value. To truly make it cost-effective, it’s important to partner with a manufacturer who understands the unique demands of golf practice surfaces.
A reliable putting green manufacturer should offer more than just turf rolls. Look for partners who can:
- Match turf options to different playing needs, from flat backyard greens to undulating professional setups.
- Support customizations such as ball speed adjustment (Stimp ratings), fringe grass integration, and size tailoring.
- Ensure product durability, with turf built to handle thousands of putts without flattening or losing ball roll consistency.
- Provide testing samples, so you can feel the surface before committing to a large order.
- Guarantee stable supply chains, especially important for projects with tight deadlines or multi-phase installations.
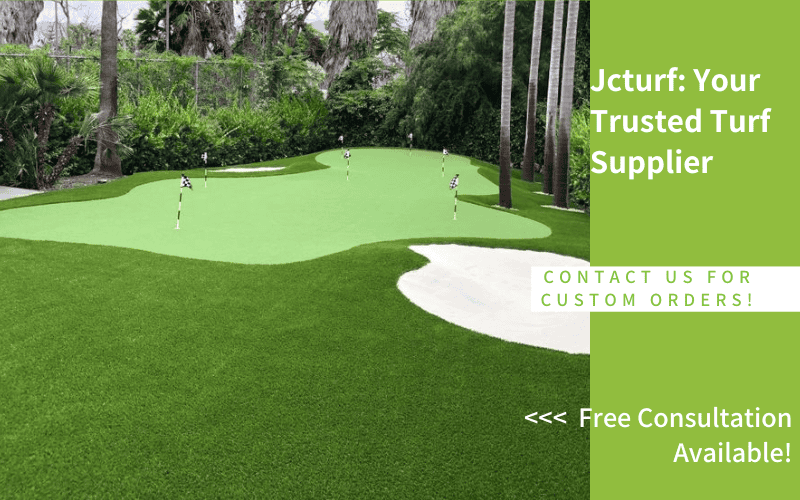
At JCturf, we specialize in manufacturing high-performance putting green turf that balances professional quality with cost efficiency. Whether you’re building a backyard green, a training facility, or a full course project, we provide tailored solutions that fit both your play goals and your budget.
Explore our putting green products and contact us today to get expert advice and customized options for your project.