If the turf isn't stretched properly, you may end up with wrinkles, lifting edges, or uneven surfaces. In this guide, we'll walk you through the basics of how to stretch your turf, avoid common mistakes, and get a smooth, long-lasting finish. Let’s get started!
Can You Stretch Artificial Grass?
Yes, you can—and you should. Properly stretching artificial grass during installation is essential for achieving a smooth, durable, and professional-looking surface. Whether it’s for your backyard, a sports field, or a commercial space, stretching your turf properly will improve its appearance, longevity, and safety.
Common Issues When Turf is Not Properly Stretched
Wrinkles and Bumps That Ruin the Appearance
Improperly stretched turf often results in wrinkles and bumps, which not only look bad but can make your turf appear worn out prematurely. These imperfections are a clear sign of a rushed or uneven installation, affecting the overall aesthetic.
Potential Safety Risks, Especially in High-Traffic Areas
Uneven surfaces can cause safety hazards, particularly in areas with heavy foot traffic. Wrinkled or lifted edges increase the risk of trips and falls, making it a significant concern for playgrounds or sports fields.
Benefits of Properly Stretched Turf
Aesthetics: A Smooth, Professional-Looking Surface
Properly stretched turf ensures a clean, smooth surface that looks neat and polished. A smooth finish not only enhances the overall look but also helps the turf fibers stand upright, maintaining a lush, natural appearance.
Longevity: Reduces Wear and Tear, Extending the Lifespan of Your Turf
Correctly stretched turf is less likely to shift or wear out, increasing its durability. It also resists the stress caused by environmental factors like UV rays and heavy rain, ensuring that your turf lasts much longer.
Stability: Helps Prevent Edges from Lifting and Ensures Secure Adhesion
Proper stretching prevents edges from lifting and keeps the turf securely attached to the base. This stability is especially important for outdoor installations where wind or weather can otherwise cause the turf to shift.
Tools You’ll Need to Stretch Your Artificial Turf
Here’s a quick rundown of the essential and optional tools you’ll need for stretching artificial turf effectively.
Essential Tools for Stretching Turf
Carpet Kicker / Turf Puller: A carpet kicker helps pull the turf tight across the surface, ensuring an even stretch and avoiding wrinkles.
Utility Knife: A utility knife is used for trimming excess turf along the edges to create a clean, professional finish.
Staples / Nails: These are used to secure the turf edges and seams, keeping everything in place during and after installation.
Roller: A roller presses the turf down evenly, helping to remove air pockets and ensuring proper adhesion to the base.
Optional Tools to Improve the Process
Power Broom: A power broom brushes the fibers upright and helps spread infill evenly for a more natural look.
Rake: A rake is used to level the base layer before laying down the turf, ensuring a smooth and stable surface.
Can You Use a Knee Kicker on Artificial Grass?
Yes, a knee kicker can be used, particularly in tight areas. It’s effective for smaller sections, but a carpet kicker is better for larger spaces.
Step-by-Step Guide: How to Stretch Artificial Turf
Now that you understand why stretching your turf is so important, let’s dive into the step-by-step process to ensure a smooth, wrinkle-free installation.
Step 1 – Prepare the Surface
Before laying down the turf, ensure that the surface is ready to support it properly.
- Clean the installation area: Remove any weeds, debris, or old grass. This will help prevent any uneven spots under the turf and ensure better adhesion.
- Create a stable base: Lay down a solid base, such as gravel or sand, to promote proper drainage and stability. A stable foundation helps maintain the turf’s position and prevents shifting over time.
Step 2 – Unroll the Turf
After preparing the area, it's time to unroll and set up your turf.
- Let the turf relax: Leave the turf unrolled for a couple of hours (or longer) to allow it to relax and remove any creases from the packaging. This is crucial to avoid wrinkles once the turf is installed.
- Ensure fiber orientation: Make sure the grass fibers are facing in the same direction across the entire surface. This will help maintain a consistent, natural look.
Step 3 – Anchor One Side of the Turf
Now that the turf is ready, it’s time to secure it.
- Secure the turf temporarily: Use stakes or pins to temporarily secure one edge of the turf. This helps keep the turf in place while you begin the stretching process.
Step 4 – Stretch the Turf Using a Carpet Kicker
Stretching is the critical step that ensures your turf is smooth and tight.
- Stretch small sections at a time: Work in manageable sections, ensuring the turf is pulled tightly and evenly across the surface.
- Apply consistent pressure: Use the carpet kicker to apply consistent pressure, working from one side to the other to ensure even tension.
Step 5 – Secure the Turf
Once the turf is stretched, it’s time to fix it in place.
- Use nails or staples: Secure the edges and seams with nails or staples spaced every few inches. This will keep the turf anchored and prevent movement.
- Check for wrinkles or air pockets: Before moving forward, make sure to inspect the turf for any remaining wrinkles or air pockets. If found, lift the turf slightly and re-stretch the area until it’s smooth.
Step 6 – Final Touches
After securing the turf, give it a polished, professional finish.
- Use a roller: Roll the turf down to ensure it’s properly pressed against the base, eliminating air pockets and securing it firmly.
- Trim excess turf: Use a utility knife to carefully trim any excess turf along the edges for a clean, sharp finish.
How to Stretch Artificial Turf on Concrete
Stretching artificial turf on concrete requires a few different steps since the surface is much harder than soil or gravel.
- Use adhesive: When laying turf on concrete, you can’t use staples or nails, so adhesive is the best option. Apply turf adhesive on the edges and seams to secure the turf in place.
- Ensure proper tension: Even on concrete, you still need to stretch the turf tightly to avoid wrinkles. Follow the same steps as usual, but be sure to use the adhesive to hold the turf securely during the stretching process.
- Roll and secure: After stretching, use a roller to press the turf down firmly, ensuring it adheres properly to the concrete surface. Trim the edges with a utility knife for a clean look.

Common Mistakes to Avoid When Stretching Artificial Turf
Stretching artificial turf may seem straightforward, but there are a few common mistakes that can ruin your installation if you’re not careful. Here are some key errors to avoid for a smooth, long-lasting result.
Skipping the Acclimation Process
One of the biggest mistakes you can make is skipping the acclimation process. When you receive your artificial turf, it’s usually tightly rolled up, and the fibers may have taken on creases or wrinkles during shipping. Letting the turf relax for a few hours (or longer if possible) before you start laying it down is essential for preventing those wrinkles from becoming permanent.
If you skip this step, you risk the turf contracting and forming visible creases once it’s installed. Allowing the turf to settle in the sun (but not too much heat) ensures that it becomes more pliable and reduces the risk of wrinkles once it's stretched across the surface.
Overstretching the Turf
While it's important to pull the turf tight, overstretching is a big no-no. When you stretch the turf too much, you can cause permanent damage to the fibers, leading to thinning or even tearing. Overstretching can also put unnecessary stress on the seams, causing them to pull apart or separate over time.
Make sure to apply consistent pressure, but never force the turf beyond its natural stretch capacity. The goal is to keep it taut without distorting its structure. A well-stretched surface will maintain its shape and stability, without the risk of damage.
Poor Edge Securing
Another mistake people often make is not using enough fasteners (nails or staples) along the edges. When the turf is not anchored down properly, the edges are more likely to shift or even lift over time, especially when exposed to weather or high foot traffic.
Spacing your fasteners too far apart can cause the edges to come loose, leading to uneven surfaces and unsightly gaps. Make sure to secure the turf every 4–6 inches along the edges and seams. This ensures that the turf stays tight and won’t shift, giving you a stable and long-lasting surface.
How to Fix Wrinkles in Artificial Turf
If your artificial turf has developed wrinkles after installation, don’t worry—it’s fixable. Follow these simple steps to smooth out the surface and restore its professional appearance.
Step 1 – Remove the Infill
First, remove the infill (the material between the grass fibers). Infill helps the turf stay upright but can get in the way when re-stretching the turf. Removing it creates a clear surface to work with and makes it easier to lift and fix wrinkles.
Step 2 – Pull Up the Turf Carefully
After removing the infill, carefully lift the turf to access the staples or nails holding it in place. Use pliers or a staple puller to gently remove the fasteners. Take your time—avoid pulling too hard, as it can damage the grass fibers.
Step 3 – Re-stretch the Turf
Once the turf is lifted and the fasteners are removed, re-stretch the turf using the same technique from the initial installation. Work in small sections, applying even pressure with a carpet kicker or turf puller. This will eliminate wrinkles and ensure a tight, smooth surface.
Step 4 – Secure the Turf Again
Once stretched, secure the turf back in place with staples or nails, spacing them every 4-6 inches along the edges and seams. Make sure the turf is tight before securing it to prevent shifting and maintain a seamless surface.
Step 5 – Replace the Infill
Finally, replace the infill evenly across the turf, using a rake or power broom to settle it into the fibers. This helps keep the turf fibers upright and ensures the surface remains stable and natural-looking. Finish by brushing the turf to lift the fibers and complete the look.
Tips for Maintaining a Smooth, Wrinkle-Free Turf Long-Term
To keep your artificial turf in top shape for years, follow these simple maintenance tips to ensure it stays smooth and wrinkle-free.
Regularly Brush the Turf
Brushing your turf regularly helps keep the fibers upright and prevents them from flattening, especially after heavy foot traffic or exposure to weather. Use a power broom or stiff-bristled brush to lift the fibers and maintain a natural look. Regular brushing also ensures the infill is evenly distributed and helps reduce wrinkles.
Re-check the Edges Periodically
Inspect the edges of your turf every few months. If the edges start to lift or shift, re-secure them with staples or nails to keep the turf intact. Tight edges prevent unsightly gaps and help maintain a smooth, even surface.
Monitor Temperature and UV Exposure
Extreme heat and direct sunlight can cause the turf to expand and contract, leading to wrinkles. UV rays can also cause fading and weakening over time. To minimize these risks, opt for UV-resistant turf and, where possible, install the turf in shaded areas or use protective covers.
By following these maintenance steps and being mindful of environmental factors, your turf will stay vibrant and wrinkle-free for years.
Why Does My Artificial Grass Crunchy When I Walk on It?
The crunchiness is likely due to improperly installed or unevenly distributed infill. Infill can settle or compact over time, causing a crunchy feel underfoot. To fix this, brush the turf regularly to redistribute the infill and ensure even coverage.
How to Extend Artificial Grass?
To extend your artificial grass, seam the edges where the turf meets, using seam tape and adhesive. You may also need to cut and match the pieces properly for a seamless look, and ensure the base underneath is stable before extending the turf.
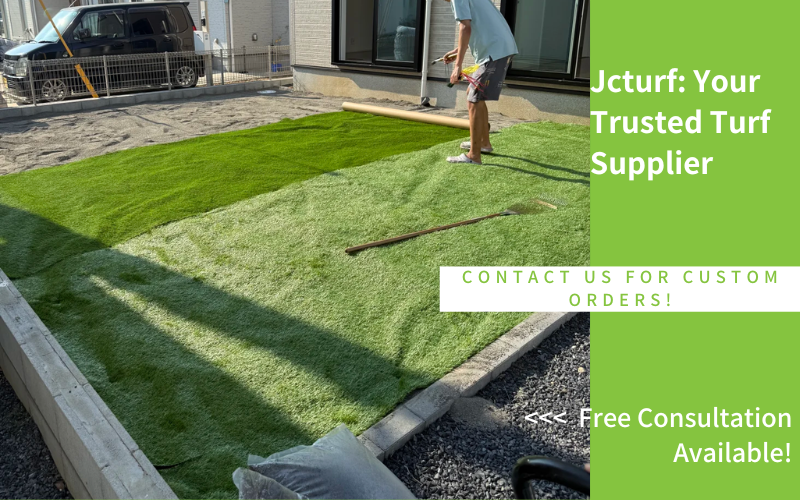
Top Artificial Turf Supplier for a Perfect Lawn Every Time
We understand that smooth, wrinkle-free turf is essential for a flawless, professional look. That's why our products are designed to be easy to install, long-lasting, and resistant to wear, ensuring they stay beautiful for years. With our turf, you can enjoy a low-maintenance, high-performance lawn that looks great all year round, without the hassle of traditional grass.
Ready to make the switch? Browse our collection of premium artificial turf and discover how easy it is to achieve the perfect lawn. Get in touch with us today to learn more about our products and how we can help you create the outdoor space you’ve always wanted!