If you’re dreaming of a backyard putting green but don’t want to deal with the endless mowing, watering, and wear-and-tear of natural grass, you’re in the right place. A synthetic putting green can give you all the fun and challenge of a professional course, without the headache of upkeep. But where do you start? From shape and size to material and installation, making the right choices can be overwhelming. Don’t worry—we’ve got you covered.
In this guide, we’ll break down 10 game-changing design ideas that you can steal for your backyard, and explain how to choose the perfect turf to make it all come to life. Whether you’re working with a compact yard or a spacious oasis, you’ll learn how to turn any space into your personal practice area. Ready to step up your game? Let’s dive in!
Core Design Ideas for Backyard Putting Greens
Your putting green should match both your yard and your goals. Here’s how to shape, size, and plan it for the best at-home play experience.
What Shape Works Best for Your Backyard Putting Green?
The shape you choose can change everything—from how your green looks to how it plays.
If you’re working with a tight or awkward yard, kidney or bean-shaped greens are a smart choice. These shapes feel natural and give you more options for cup placement. They also soften sharp yard edges and blend well with existing landscaping.
For something compact and clean, circular or oval greens work well in square yards. They’re easy to design and great for straight putts.
If you’ve got a long narrow space, like a side yard or between a fence and patio, try an L-shape or narrow strip. These are perfect for practicing distance control and alignment.
No matter what you pick, try sketching the shape first—or even lay it out with a garden hose. It’s the easiest way to visualize how it fits before building.
| Putting Green Shape | Best For This Type of Backyard | Why It Works |
| Kidney | Irregular or asymmetrical yards | Natural curves blend well with landscaping and offer cup variety |
| Bean | Medium-size yards with uneven edges | Creates soft transitions and playful layout |
| Circle or Oval | Square or open central yard areas | Clean, simple, and ideal for straight-line putting |
| L-Shape | Corners or side yards | Efficient use of tucked-away spaces |
| Narrow Strip | Long, tight spaces like fences or walkways | Great for distance control practice |
| Freeform | Large open spaces or garden-style yards | Offers full customization with a natural look |
| Rectangle | Highly structured, modern backyard layouts | Easy to install and measure; great for multi-hole setups |
| Dogbone (double-lobed) | Wider yards with more width than depth | Allows multiple holes and zones within a compact area |
How Big Should a Backyard Putting Green Be?
Most residential greens fall between 100 and 600 square feet. That’s enough space to keep things fun and functional without dominating your entire yard.
If you’re tight on room, even a 150-square-foot green can offer great practice value. You just need smart shape planning and thoughtful cup placement.
Medium spaces around 300 to 400 sq. ft. let you add multiple holes, a bit of fringe, and maybe a small chipping zone.
Have more space? 500+ sq. ft. opens the door for more creative layouts, extra hole positions, or a separate chipping mat.
Just remember: you still need walkable space around the green for smooth play and maintenance.
How to Plan Hole Number and Placement Like a Pro
Even small greens can play like big ones if you place your holes well.
One to three holes is common for backyard setups. If you’re a beginner or just want light practice, one central cup is enough. If you’re more serious, spread out two or three holes in different corners.
Try to angle the holes, not just line them up. This gives you more variety in putts and makes your green feel less repetitive.
Avoid placing cups right on the edge—they’ll roll balls off the green and feel less natural. Leave a buffer around each hole for better playability.
Should You Add Elevation or Contours to Your Backyard Green?
Adding some slope makes a big difference—without making things complicated.
A slightly contoured surface can simulate real course conditions. It makes putting more fun and helps you practice breaks and speed control.
If you’re confident with turf installation, a multi-tiered green is an advanced option. It gives you elevation changes between hole zones and can even double as a chipping target.
But even one simple break or dip adds realism. Just make sure water can still drain properly—good play starts with good drainage.
10 Backyard Putting Green Ideas You Can Steal
Some ideas are beautiful but hard to build. These aren’t. Each of these putting green setups has been done in real backyards and can work with the right planning and turf system.
Corner Green for Small Yards
Tight on space? A corner green makes use of space you’d probably ignore otherwise.
If you’ve got an unused corner behind your patio or fence, a small triangular or L-shaped putting green fits perfectly. It takes up little room but still gives you a functional putting zone for short putts and single-hole practice.
You can use short-pile turf and skip the fringe if you want a clean, minimalist finish. If the corner slopes, try a raised edge or soft border like mulch to keep it level and neat.
“Corner greens are often DIY-friendly—especially when paired with lightweight turf panels and no infill.”
Side Yard Strip
Got a narrow side yard? Don’t waste it—turn it into a straight putting strip.
This layout runs along a fence or house wall, offering great practice for distance control and alignment. A single hole at the far end is often enough. If you add a fringe, it also makes a great practice zone for bump-and-runs.
Keep the layout clean with just one turf type and maybe a stepping stone path along one side.
Quick tip: Use compacted stone and drainage panels if your side yard tends to stay wet after rain.
Kidney-Shaped Green with Multi-Hole Layout
Want something that feels like a real course green? This one’s for you.
A kidney shape gives you a natural curve to work with—and enough surface area to place 2 or 3 holes at different angles. That way, you can mix up your putts without moving your stance too much. It also blends beautifully with existing landscaping.
| Best For | Medium-to-large backyards with natural contours |
| Recommended Turf | JCT Tour Green + Fringe + Light infill |
| Skill Level | Best for intermediate players who want variety |
Pro Suggestion: Place the farthest hole at a slight uphill angle. It increases difficulty and makes practice more realistic.
Putting Green with a Firepit Hangout
This idea brings golf and gathering together. It’s not just a place to practice—it’s also a space to relax with friends and family.
Place a medium-sized putting green (around 300–400 sq. ft.) adjacent to a patio or firepit. Keep at least 3 feet between the green and the firepit to avoid heat exposure to the turf. Use short-pile turf for the putting surface, and a slightly taller fringe turf to frame the area and make it feel cozy.
For finishing touches, consider adding:
- Curved bench seating around the edge
- Low landscape lighting for evening play
- Decorative stone or paver border to separate turf and patio
This setup is ideal for social golfers who want a multi-use space, especially in climates with mild evenings.
Mini Golf Backyard Course
Want something the kids (and guests) will love? Try a playful twist—design your own mini course.

You don’t need much space. A few small putting zones connected by short walkways, or even standalone greens with obstacles, can create a fun backyard challenge. Use bright turf colors, small ramps, or playful elements like garden gnomes or planters as obstacles.
Key features to consider:
- Use 2–5 mini greens, each around 6–8 ft long
- Keep each hole unique—one with a slope, one with a tunnel, one with a bump
- Use basic polyethylene turf (not too fast) so kids can enjoy the game without frustration
You can even assign a scorecard to each zone for game-night vibes.
Poolside Putting Green
A putting green near your pool brings that resort-like feel right to your backyard.
This design works best in yards with pool decks that have extra room along one edge or behind the pool. Just make sure the turf drains well and doesn’t hold moisture.
Here’s how to keep it both stylish and practical:
- Choose UV-stable turf with good drainage backing
- Avoid infill near the pool—go with high-density turf that holds its shape without sand
- Use tropical plants or small rock features between the green and the pool to blend the elements
- Keep the turf cool by choosing lighter green tones or shaded placements
This setup is low maintenance and gives you a quick putting break while lounging.
Multi-Tier Chipping + Putting Green
For golfers who want more than flat putts, adding levels creates a new challenge.
This design uses elevation to separate different zones—like a raised chipping pad on one side and a lower putting surface on the other. The elevation doesn’t need to be extreme. A 6–8 inch step-down between areas is enough to simulate real-course shots.
Here’s a suggested setup:
- One main putting surface (250–350 sq. ft.)
- One raised area (1–2 feet higher) for chips
- Use turf with rougher texture on the chipping side
- Add fringe zones around the base to catch missed shots
It takes more planning (and often professional installation), but it’s worth it if you want a short-game training ground.
Zen Garden Putting Area
Looking for calm over competition? A Zen-inspired layout gives you a peaceful place to practice.
Blend your putting green with soft natural elements: gravel paths, smooth stepping stones, and bamboo or ornamental grasses. Use neutral-colored turf and avoid over-decorating. This is about simplicity, not flash.
Design tips:
- Keep the green shape round or freeform
- Use beige or light green turf with subtle grain
- Surround with gravel or fine rock for contrast
- Add a small water feature or rock lantern for ambiance
This design isn’t just for looks—it’s great for slow-paced practice and quiet moments.
Chipping Green with Sand Trap
If you’ve got a bit more space and want realism, add a sand trap next to your green.
Dig out a shallow bunker (about 4–6 inches deep) and frame it with a retaining edge or pavers. Use actual bunker sand or fine white silica. Then install your putting green with fringe leading right up to the edge.
Things to keep in mind:
- Your base layer should allow drainage underneath the bunker
- Install turf with clear separation between putting, fringe, and sand
- Consider a slightly raised turf lip between sand and green for better control
This design gives you everything from flop shots to sand saves—without heading to the golf course.
Portable Modular Green for Tiny Spaces
No lawn? No problem. Modular putting greens are great for renters, decks, or even balconies.
These pre-made kits use interlocking base tiles and synthetic turf pre-cut to standard sizes. You can assemble them in under an hour, and many allow you to switch up the layout.
What makes them work:
- No digging or base prep required
- Most come with built-in cup holes and slight breaks
- Can be used indoors or outdoors year-round
- Easily moved or expanded later if space allows
This is the most flexible option if you’re short on space or just want something you can take with you.
Upgrading Your Backyard Putting Green: Affordable Improvements
Enhancing your backyard putting green goes beyond just its shape and size. With the right materials and maintenance strategies, you can make it feel more like a real golf course and ensure it lasts for years.
What Materials Make a Putting Green Feel Like the Real Thing?
When choosing turf for your backyard putting green, the right material can make a huge difference in how it feels and performs.
To get that authentic golf course experience, focus on pile height and fiber density. The taller the pile, the more forgiving the surface will be, especially on short putts. For more realism, choose high-density fibers which replicate the way natural grass holds its shape under pressure.
- Pile Height: Shorter fibers (10–15mm) work best for putting greens, providing smooth ball roll.
- Fiber Density: Higher density means fewer gaps between fibers, resulting in a more consistent roll.
- Multi-Texture Turf: Combining putting turf with a fringe area (slightly taller grass) adds visual appeal and realism, mimicking the look of real golf greens.
You’ll want to choose turf designed specifically for putting. Avoid using typical lawn turf as it can cause uneven ball speed and won’t last under heavy foot traffic. For durability and performance, go for nylon or polyethylene-based turf.
Should You Install It Yourself or Hire a Professional?
When it comes to installation, deciding between DIY or professional help depends largely on the complexity of your design and the condition of your yard.
If you have a flat yard and a simple design, DIY is totally doable. You can follow online tutorials and use pre-cut turf rolls for a straightforward setup. Make sure the ground is leveled and compacted before laying the turf. You can also save costs by using modular tiles for smaller, flat spaces.
However, for sloped areas or custom designs (like multi-tiered greens or complex contours), it’s a good idea to bring in professionals. They have the tools and expertise to properly grade the land, add drainage systems, and ensure the turf is installed securely.
Think of it this way: DIY saves money, but a professional setup gives you a golf-course-quality result with less hassle.
How to Make Sure Your Backyard Putting Green Stays Low Maintenance
Keeping your putting green in top shape doesn’t require constant work, but there are a few things you’ll need to stay on top of.
- Brushing: Regular brushing helps keep the grass fibers standing upright, ensuring a smooth ball roll.
- Debris Control: Sweep away leaves, twigs, and other debris to prevent buildup, which could affect playability and drainage.
- Proper Drainage: Ensure your putting green has a well-designed drainage system to prevent water from pooling, which can damage the turf and make it difficult to practice.
To make maintenance even easier, consider installing infill in the turf, which helps reduce matting and keeps the fibers upright. You don’t need to maintain your green as often as natural grass, but a quick brush and occasional rinse will keep it in great shape.
If you live in a particularly dusty or dirty area, using a leaf blower on the turf every now and then can keep the surface looking fresh and functional.
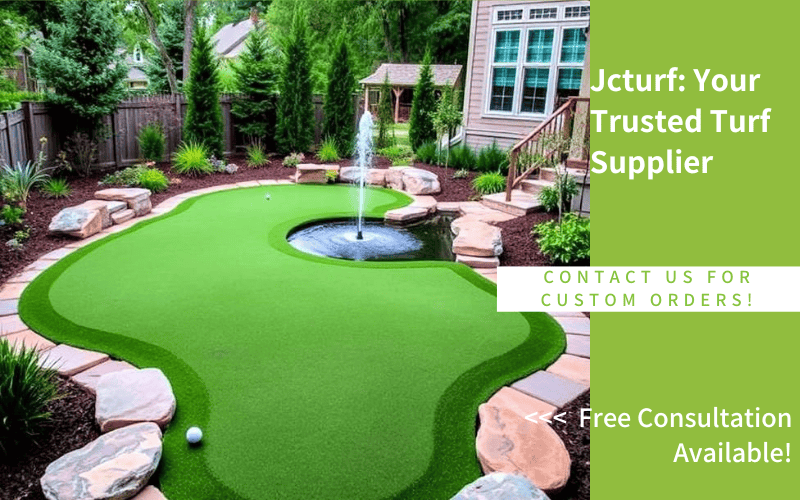
Build Your Backyard Golf Green with a Trusted Manufacturer
Want to turn your backyard putting green ideas into reality? The right turf makes all the difference. At Jcturf, we make high-quality putting green turf that is smooth, strong, and easy to take care of.
Whether you need it for home use or a landscaping project, we offer reliable products and expert support.
Visit our Backyard Putting Green to see options to explore more or contact us to get started. We are always here to help you build a green that plays well and lasts long.